Introduction
The “Create” page invites you to create your own tessellation art:
- Edit the key tile outline to make an interesting shape
- Draw interior detail to make the shape come alive
- Choose tile colors
- Save, to your device or to Google Drive
- Animate your artwork
- Export an image or video
And this video shows an example of the full creation process:
Main buttons
Back to topThere are two editing modes — one for tile shape and one for tile detail:
|
|
Shape mode | Edit tile shape by adding and moving points |
|
|
Detail mode | Edit interior tile detail using drawing tools |
The main toolbar has these buttons:
|
|
Save | Save current tessellation (button turns red if there are unsaved changes) |
|
|
File menu | Create, open, save, export, or see info for a tessellation |
|
|
View menu | Zoom, show/hide overlays, or show an animation |
|
|
Color panel | Choose colors for tiles and tile detail |
|
|
Settings | |
|
|
Help | Show this page |
|
|
Undo | Undo last operation |
|
|
Redo | Redo last undo |
|
|
Zoom in | Make tiles appear larger |
|
|
Zoom out | Make tiles appear smaller |
Edit tile shape
Back to topIn shape mode, modify the outline of the key tile:
- Drag a point to move it. Other points will also move to keep the tiles adjacent.
- Click a tile edge to add a point. The point will be angled or curved depending on which tool is active. A point will also be added on the edge’s partner edge.
- Drag the tessellation to scroll.
These top tool buttons are available:
|
|
Add curved points | Click a tile edge to add a curved point; drag a point to move it |
|
|
Add angled points | Click a tile edge to add an angled point; drag a point to move it |
|
|
Rotate tessellation | Drag the tessellation to rotate it |
When an added point is selected, these buttons appear:
|
|
Loosen curve at selected point |
|
|
Tighten curve at selected point |
|
|
Delete selected point |
You can also undo and redo your edits, color the tiles, and use keyboard shortcuts.
Edit tile detail
Back to topIn detail mode, draw interior detail on the key tile.
These top tool buttons are available:
|
|
Select | Select, move, resize, and rotate objects |
|
|
Pan | Scroll the view |
|
|
Draw circle | Drag to create a circle from its center |
|
|
Draw curved shapes and lines | Click to add a sequence of curved points; return to first point to close, or double-click to add final point |
|
|
Draw angled shapes and lines | Click to add a sequence of angled points; return to first point to close, or double-click to add final point |
|
|
Draw freehand | Drag to draw directly |
|
|
Rotate tessellation | Drag tessellation to rotate it |
|
|
Object menu | Options to select, copy/paste, and raise/lower objects |
When an object is selected, these buttons appear:
|
|
Edit points of selected object | Click this button (or double-click an object) to enter point editing mode |
|
|
Delete selected object |
In point editing mode, these buttons appear:
|
|
Loosen curve at selected point |
|
|
Tighten curve at selected point |
|
|
Delete selected point |
You can also undo and redo your edits, edit colors, and use keyboard shortcuts.
Edit colors
Back to topThe color panel has separate tabs for editing colors of the tiles themselves and for editing colors of tile detail objects.
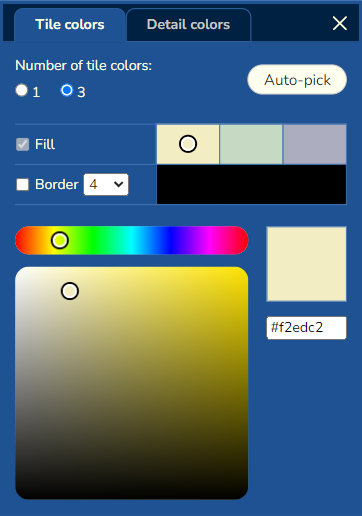
On the “Tile colors” tab, try hitting the “Auto-pick” button a few times to find a color scheme you like. Or set tile colors individually, adjusting each tile color in the “Fill” row by selecting its swatch and using the color controls. You can also add tile borders using the controls in the “Border” row.
The “Detail colors” tab works in detail mode to edit colors of the currently-selected detail object. The tab’s top radio buttons let you either ”Use tile colors” or “Choose colors”.
When ”Use tile colors” is chosen (as it is by default) the selected object’s colors are derived from the currently-chosen tile colors. Set the object’s “Fill” color and “Border” color using these options:
- Use shade of tile color — object color is based on tile color (a specified percentage lighter or darker).
- Use adjacent tile’s color (the default) — object color will be the same as the adjacent tile’s fill color.
- Use tile border color — object color will be the same as the tile border color (even if no tile border is visible).
Or, when “Choose colors” is chosen you can specify how the detail object will appear against each tile color, using the same controls described above for the “Tile colors” tab. Additionally you can check “Same for all tiles” to make the object’s colors be the same on tiles of any color.
Save tessellation
Back to topThe File menu has operations for tessellation files — new, save, open, and export. Tessellation files may be stored either locally on the current device, or in Google Drive.
Please note there is no autosave — save your changes! To help remind you, the Save button turns red when there are unsaved changes.
The behavior when storing files locally depends on the device and browser. For example:
- With Chrome or Edge on Windows / Mac / Linux, only the initial save raises a dialog.
- With other browsers (such as Firefox or Safari) on Windows / Mac / Linux, every save raises a dialog.
- With iOS or Android, every save is a “download”, without the option to replace the previous version.
When saving to Google Drive only the initial save raises a dialog, regardless of the device and browser.
Animate
Back to topFrom the View menu you can animate the current tessellation two different ways. “Animate from grid” shows an animation like those on the Home page, and “Animate from shape” shows an animation like those on the Art pages.
You can interact with the animation using these controls:
| Play or pause |
Click “play” button or click the artwork |
| Jump to frame |
Click a stage image or click the slider or drag the slider |
Share your art
Back to topThe best way to share your tessellation art is to export an image or video and post it to your favorite sharing site.
To export an image, choose “Export PNG image” or “Export SVG image” from the File menu. To export a video, open an animation via the View menu and choose “Export video”.
When sharing, please use the hashtag #TiledDotArt to help other Tiled.art users find your art.
Make a physical tile
Back to top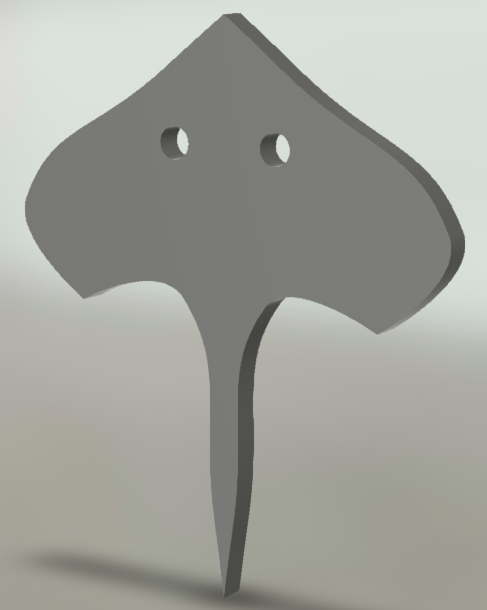
To make a physical tile, choose “Export STL/STEP piece” from the File menu. Use STL for creating a tile on a 3D printer, or STEP if you want to open your tile in CAD software for further editing.
If you draw a circle or closed path on the tile, the output will contain a hole.
Tips
Back to topWhen you make a new tessellation, the tile shape is often irregular. If you want to start with a more symmetrical tile shape, just hit the Undo button.
To see which tessellation symmetry the current tessellation is based on, open the “Info” panel via the File menu.
If you've changed the tile colors and want to revert to the default colors, change “Number of tile colors” on the Color Panel and then change back to the number you were using.