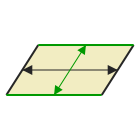
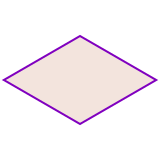
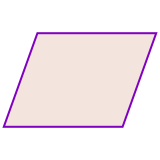
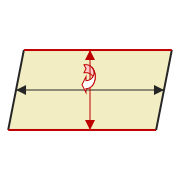
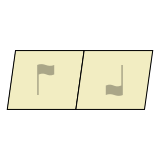
This parallelogram tessellates via translations in two directions.
Sliding horizontally aligns the black edges, and sliding vertically aligns the green edges.
Let's understand the structure behind the art, step-by-step.
In each artwork on this site, a recognizable figure repeats to fill the page with no overlaps or gaps. The figures are called tiles, and the arrangement is a tessellation.
Each tile shape is based on a polygon with 3-6 sides — that is, a triangle, quadrilateral, pentagon, or hexagon.
Here are some examples of polygons that can tessellate.
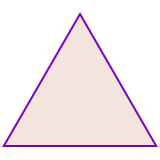
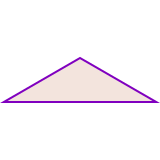

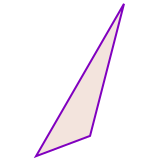
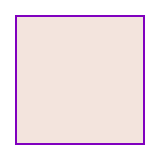
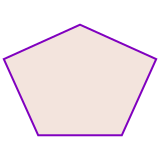
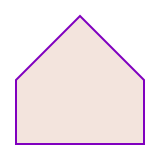
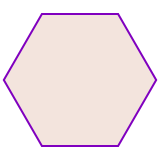
Interestingly, any triangle or quadrilateral can tessellate, but only some pentagons and hexagons.
How does a polygon become an artwork? There are two steps:
In step 1 the recipe comes from a tessellation symmetry. The artworks on this site use 35 different symmetries, 8 of which are shown in examples below. (The symmetries are also presented, summarized, and classified on other site pages.)
Each symmetry tells how to make a tessellation, by a series of steps where a tile is duplicated and moved to be next to the original. The movements are called transformations, and there are three kinds:
See below for examples of each. Many thanks to the artists for permission to use their artworks as examples.
A translation slides a tile in a straight line. For example:
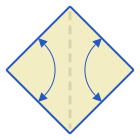
This parallelogram tessellates via translations in two directions.
Sliding horizontally aligns the black edges, and sliding vertically aligns the green edges.
Once the tiles are placed, an artist (you!) can change the shape of an edge. The opposite edge also changes shape, as well as all other same-colored edges. If the artist is good, the result is a recognizable figure!
Glide reflection is a translation plus a flip about the axis of translation. For example:
This parallelogram has a glide reflection along the vertical axis, so the tiles above and below the central tile are flipped horizontally. It also has a translation along the horizontal axis.
Now the edges can be reshaped. Reshaping the red glide-reflected edge also reshapes its opposite edge, but from the other end since it is flipped.
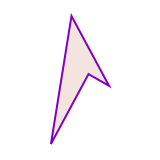
Based on “fish1” by .
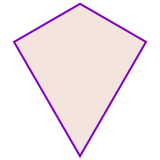
Glide-reflected edges can be adjacent on a tile (unlike translated edges, which are always opposite). For example:
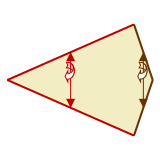
This kite shape has two different glide reflections, both along the vertical axis.
After a tile slides and flips, the same-colored edges are aligned.
As above, reshaping a glide-reflected edge also reshapes its partner edge, but from the other end since it is flipped.
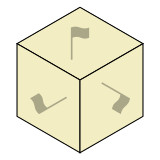
Rotation fits several tiles together around a point. When rotating around a corner point, 3, 4, or 6 tiles can fit together:

When rotating around an edge midpoint, 2 tiles fit together:
Here's an example of rotating around a corner point:
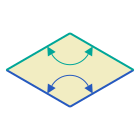
This rhombus has two hubs of 3-way rotation.
Rotating around the blue hub aligns the blue edges, and rotating around the green hub aligns the green edges.
When the edges are reshaped, edges meeting at the blue hub change together, and edges meeting at the green hub change together.
Now an example of 2-way rotation:
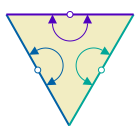
This triangle has three hubs of 2-way rotation—one at the midpoint of each edge.
2-way rotations are different from other transformations because they align two parts of the same edge rather than aligning two separate edges.
When one half of an edge is reshaped the opposite half also changes. Other same-colored edges change as well.
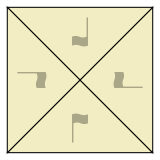
In some tessellations, tiles are symmetrical across an inner mirror.
That means each edge, in addition to having a partner edge with the same shape, also has a twin edge on the other side of the mirror.
Each edge shape appears four times in the tile outline, in contrast with the previous examples where each edge shape appears twice in the tile outline,
For example:
Tiles that are rotated or flipped have a different orientation than the original tile.
If we count all the tile orientations in a tessellation, the number could be 1, 2, 3, 4, or 6—depending on the tessellation's symmetry.
To fill the page we can make a group containing one tile with each different orientation, and then translate that group in two directions.
For example:
This tessellation has 3-way rotational symmetry.
After grouping three tiles together (one with each rotated orientation) we can translate the group in two directions to fill the page.
Here's another example, with both rotated and flipped tiles:
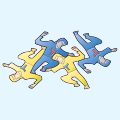
This tessellation has both glide reflection and 2-way rotation.
There are four different tile orientations—original, rotated, flipped, and both rotated and flipped.
After grouping four tiles together (one with each orientation) we can translate the group in two directions to fill the page.
The steps outlined above show how a single polygon can transform to a tessellation artwork. The Art pages also show these steps—every artwork can be animated to show its evolution from a single polygon.
Note that these steps show the artwork’s structure, not necessarily how it was created. Tessellation artists work in many different ways, with processes that are often quite different from these steps, and from the animations.